Writing
Building a 3D-printed reMarkable recording stand with nurb
How I used nurb and a series of small test prints to design a 3D-printed overhead phone stand for recording my reMarkable 2.
On this page
I wanted a simple way to record myself writing on my reMarkable 2. What I ended up making was a custom, 3D-printed reMarkable recording stand. Along the way, I found a much better way into 3D design.
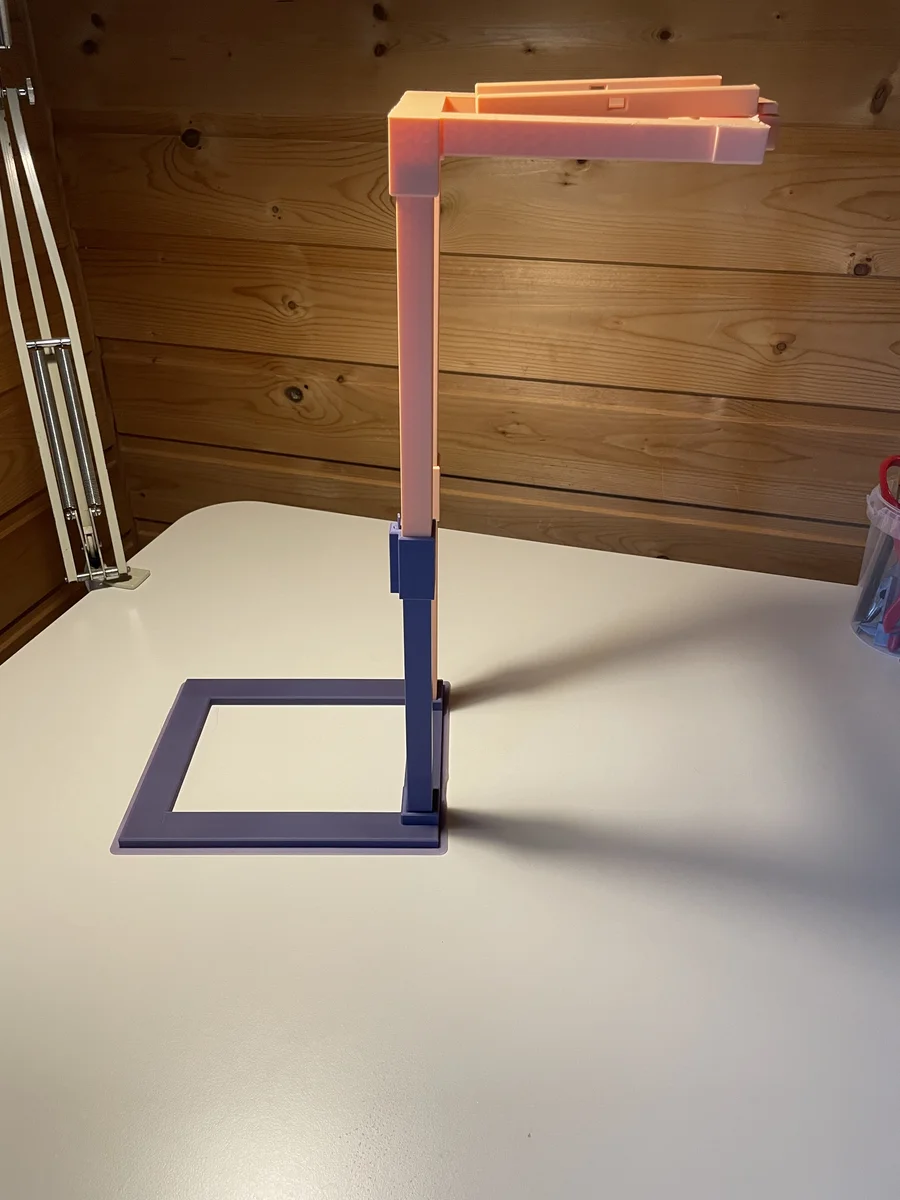
The stand holds my iPhone above the tablet so its camera looks straight down at the screen. It leaves the sides open, giving my hand and the Marker room to move.
This was my first attempt at making something with nurb, created by Josh Pigford. More importantly, it was the first time 3D design felt less like learning a specialist tool and more like working through an idea.
Starting with a prompt
I began by describing what I wanted in much the same way I would explain it to another person:
We are going to print a custom stand for video recording via a mobile.
I have a reMarkable 2 tablet. I want to create a tower, or stand, to place my iPhone 12 mini so it can record the screen.
The phone would be placed in portrait mode. The tablet would sit naturally in portrait mode.
I am left-handed, so perhaps we need to factor in where the supports are, to allow freedom of writing with the pen, for right- or left-handed people.
That prompt was not a specification. I had not worked out the exact height, how the pieces would join, or how the phone would attach. It was simply a useful description of the problem: hold a phone above a reMarkable, keep the whole screen in frame, and stay out of the writer’s way.
With nurb, that was enough to start a conversation and get an initial model on screen. I could react to something concrete, ask for changes in ordinary language, and watch the idea turn into parts that could actually be printed.
When the first design was ready to print, I shared the moment on X:
Designed a custom stand to video my remarkable, currently being printed.
@Shpigford nurb is a very nice tool!
A stand made from printable parts
The full stand is taller than my printer can produce as a single object, so it had to become a system of smaller pieces: a base, two-part masts, a boom, and a phone cradle. Pins, collars, and clips hold those larger pieces together.
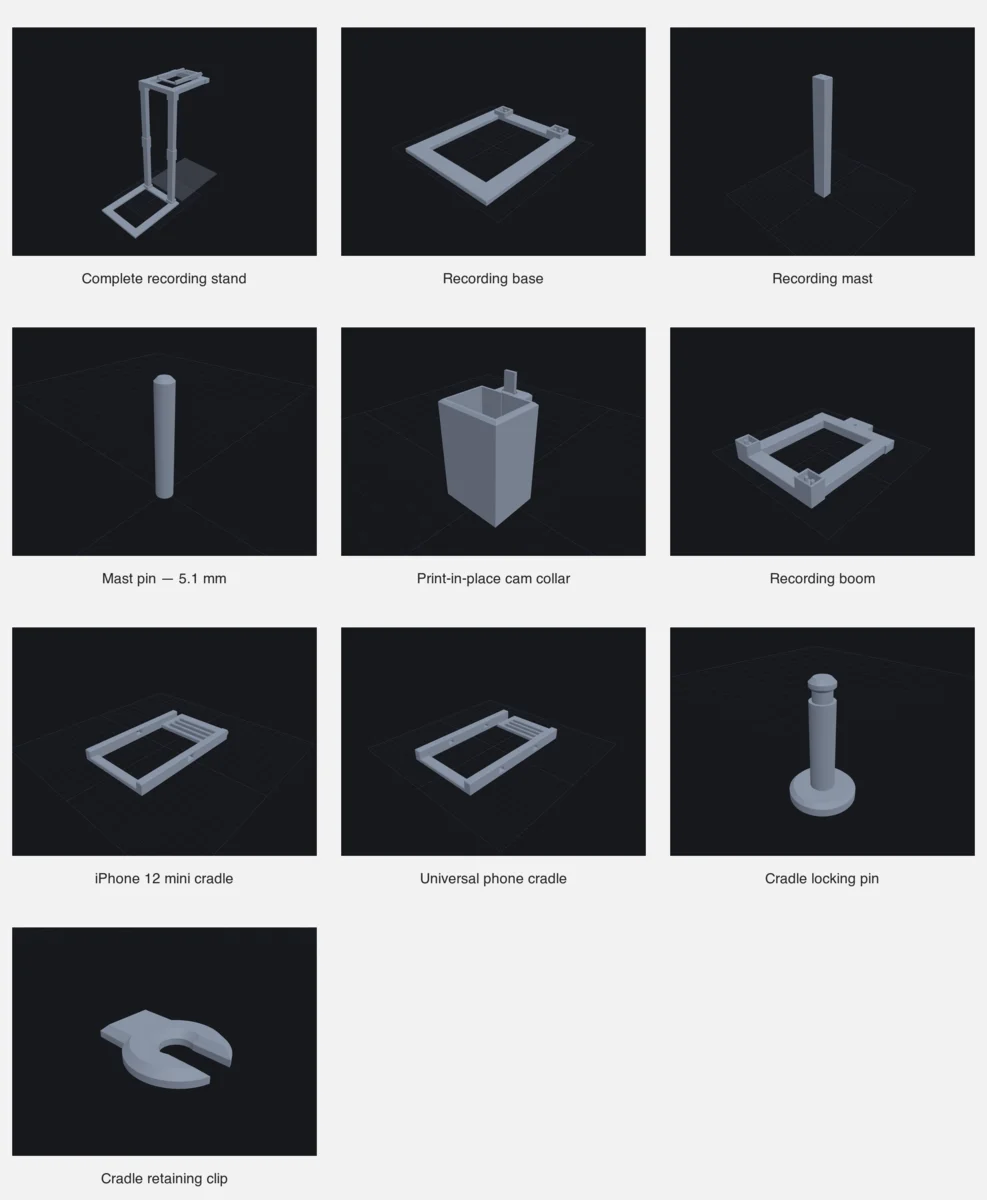
The models and project files are available in the reMarkable phone recording stand repository on GitHub. I put the project up in its current state, so the files and notes are still a little rough.
Splitting the design was initially a practical constraint, but it made the result more useful. A failed connection no longer meant reprinting the entire stand. The phone cradle could change without changing the tower. Each part became something I could test and improve on its own.
This modularity also made the project less intimidating. I was no longer trying to get one large, complicated object right. I was solving a series of small fit problems.
Small test prints changed how I worked
The most useful lesson was to avoid printing a whole part when I only needed to test a few millimetres of it.
It is tempting to treat the digital model as the finished design. The dimensions look precise, the pieces line up, and the render appears convincing. Then the printer introduces the physical world: clearances, friction, flex, layer direction, and the small differences between a hole on screen and a hole produced in plastic.
Instead of repeatedly committing time and filament to complete pieces, I began making small 3D printing test prints of the areas that mattered. A short section could tell me whether a pin fitted. A partial joint could show whether a mast felt secure. Those tiny experiments were quick to print and easy to discard, which made it easier to try another idea.
That changed the rhythm of the project. A print was no longer the final exam for a finished design. It was simply the next question.
From loose joints to a print-in-place collar
The mast connections went through the clearest evolution.
The first version joined the mast sections without a collar. It was simple, but it did not give the tall structure enough support. The next version added a collar around the joint. That was better, but handling the printed pieces suggested there was still room for a more deliberate locking mechanism.
The eventual version became a print-in-place collar with a small cam mechanism. Turning the cam grips the mast and makes the connection feel much more stable.
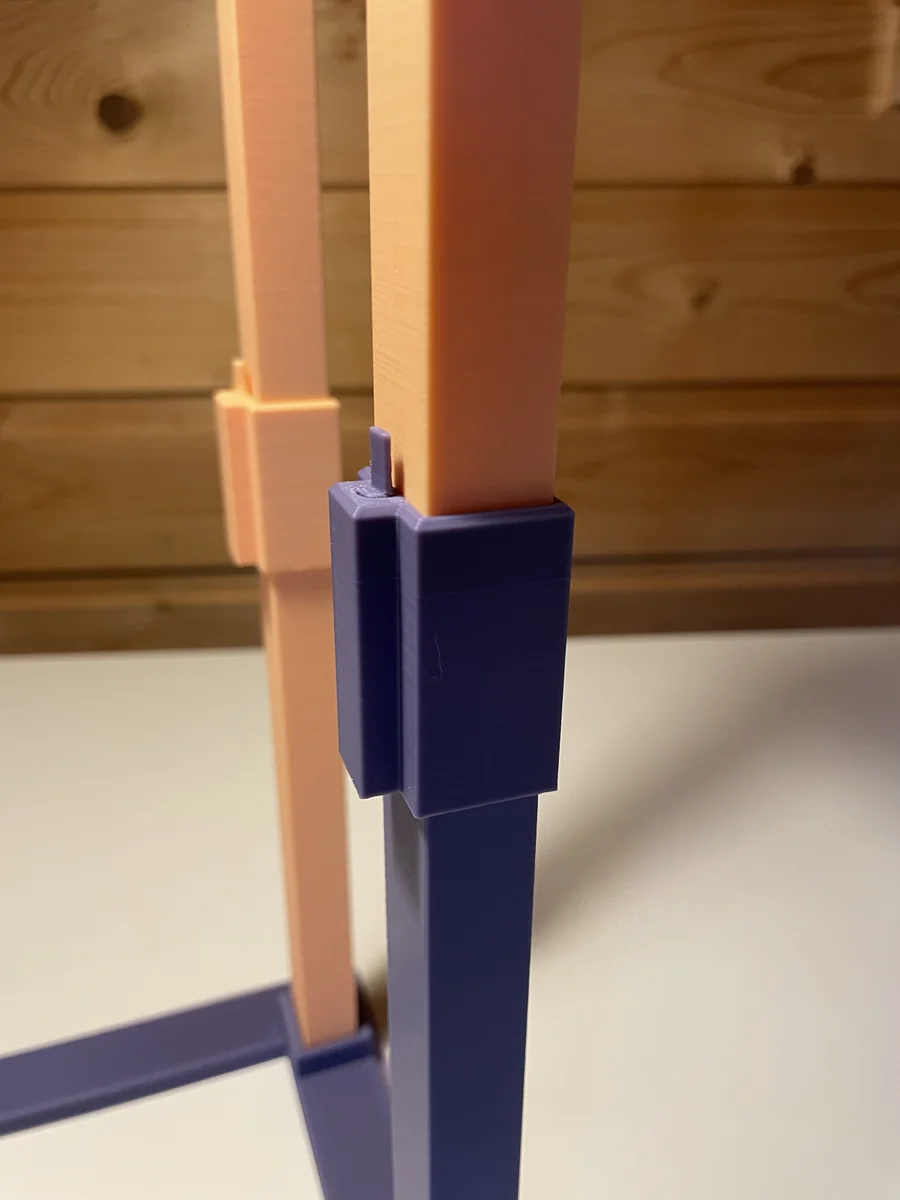
I liked this iteration because it did more than make a dimension slightly larger. The physical test changed the mechanism. The design went from no collar, to a passive collar, and finally to a moving printed part. That is something I would have struggled to explore in traditional CAD.
Other connections evolved in the same way. I added dowels where the masts meet the base, then revised the boom to use dowels as well. The cradle gained its own locking pin and retaining clip. None of these details were exciting in the first sketch, but together they are what turned a collection of printed shapes into an object I could assemble and use.
Testing the 3D-printed reMarkable recording stand
The finished stand places the phone directly above the reMarkable and keeps the writing area clear. From the mounted iPhone, the whole screen fits in portrait frame with space for my hand to move across it.
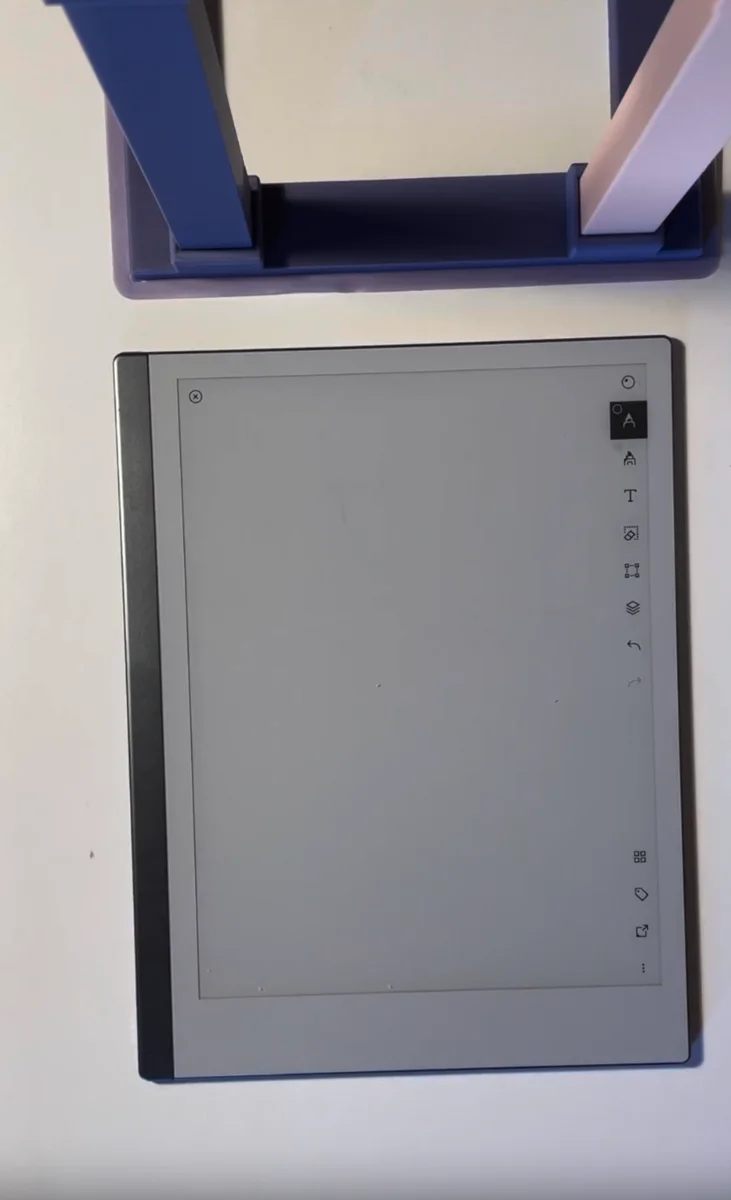
The view from the mounted iPhone before recording begins.
What I would change
The biggest win is simple: it works. I can put my reMarkable beneath the phone, write naturally, and record the screen. For a first attempt at using nurb, that feels like a big success.
The finished stand has also made the next set of improvements clear. The base needs a counterweight. A heavy book placed across the rear keeps it stable, but version two should stand confidently on its own.
The iPhone holder needs more work too. Its connection to the boom feels fragile, and the camera framing is limited by the holder’s current position. The iPhone gives me less freedom to zoom and pan the view than I expected, so a more adjustable holder would make it easier to position the whole reMarkable exactly where I want it in the frame.
I am happy with how the stand looks, although next time I would print it all in one colour. The first structural changes would be a self-supporting base, a stronger boom connection, and a more flexible iPhone holder.
Making physical ideas feel approachable
I have struggled to learn 3D design in the past. There is a large gap between imagining an object and knowing which operations in a CAD application will produce it. That gap is where this project usually would have stopped.
nurb helped me cross it. I could describe the result and its constraints, inspect what it produced, print the uncertain parts, and bring what I learned back into the next iteration. It did not remove the need to think about fit or stability. It gave me a way to engage with those problems without first becoming fluent in a traditional modelling interface.
The small test prints were just as important. They made being wrong cheap. Once I stopped treating every print as a finished object, each failed fit became useful information instead of wasted effort.
This recording stand is not a perfectly polished product. It is better than that: it is a physical object that began as a plain-language idea, improved through real tests, and now does the job I made it for.
Made possible by nurb.dev.